Step-by-Step Guide for Beginners: Cultivating Cardamom from Seeds at Home

Unlock the secrets to cultivating your very own aromatic paradise by mastering the art of growing cardamom from seed right in the comfort of your home.
Cardamom, often referred to as the “Queen of Spices,” is loved around the globe for its unique aromatic, slightly sweet, and warm flavor. Whether it’s enhancing your favorite dishes or adding a delightful twist to beverages, cardamom is a spice that holds immense value. While many of us depend on store-bought cardamom pods, have you ever considered the joy of growing this fragrant herb right at home? Even if you have limited space, cultivating cardamom can be both feasible and immensely gratifying.
In this comprehensive guide, we’ll take you through straightforward steps to cultivate cardamom from seeds in a pot, ensuring that you enjoy a steady supply of this exotic spice right from your own kitchen!
Why Grow Your Own Cardamom?
Growing cardamom offers several remarkable benefits:
- Fresh & Organic: By cultivating cardamom at home, you can enjoy a chemical-free, organic spice without the preservatives and additives often found in store-bought versions.
- Cost-Effective: Store-bought cardamom can be pricey, especially when it comes to organic options. Growing it yourself can save you a good amount of money over time.
- Aromatic & Beautiful: Not only will you have access to fresh cardamom, but the plants themselves are lush and aromatic, enhancing the aesthetics of your indoor or outdoor space.
- Satisfying & Rewarding: There’s a unique sense of fulfillment that comes with nurturing and harvesting your own herbs, knowing they were cared for by you.
Getting Started: Essentials You’ll Need
Before embarking on your cardamom-growing adventure, gather the following essentials:
Germinating Cardamom Seeds
Germination is the first step, and while it requires some time, the rewards are definitely worth the wait. Here’s how to start:
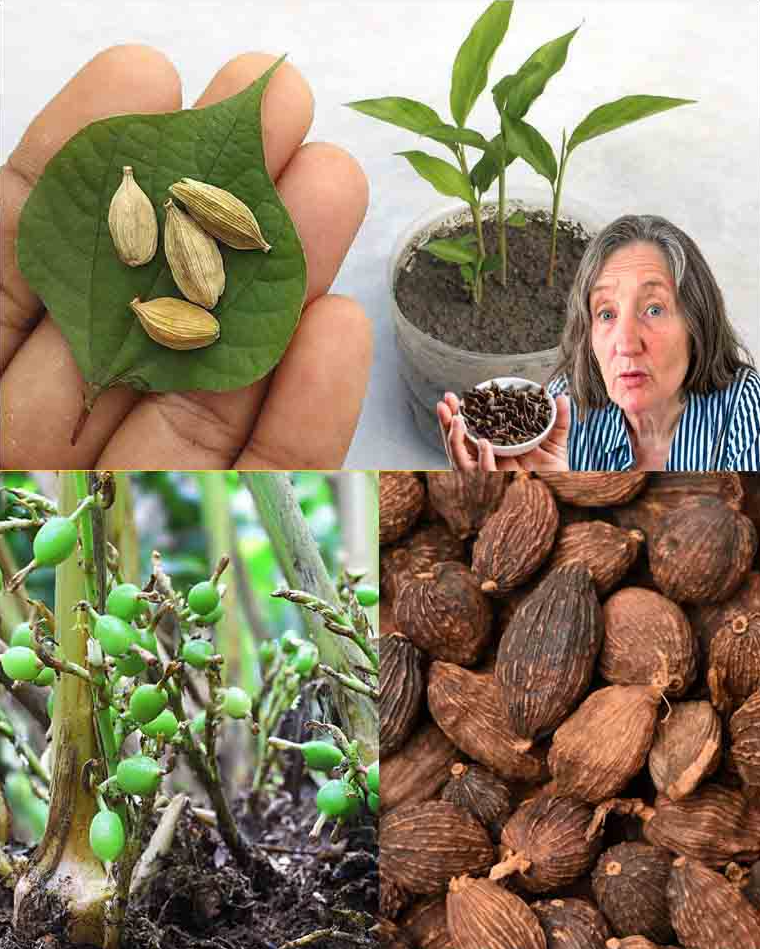
- Prepare the Seeds: If you have cardamom pods, crack them open and extract the seeds. Soak the seeds in warm water for about 24 hours. This softens the outer shell and encourages faster germination.
- Prepare the Pot & Soil: Fill your pot with a well-draining potting mix, leaving about an inch of space at the top. Ensure the pot has drainage holes to prevent waterlogging.
- Plant the Seeds: Plant the soaked seeds about ½ inch deep, spacing them 2-3 inches apart. Gently cover them with soil, but avoid pressing down too hard for proper air circulation.
- Water & Cover: Water the pot thoroughly, ensuring the soil remains moist but not waterlogged. Cover the pot with plastic wrap or a mini greenhouse cover to maintain humidity.
- Maintain Warmth: Position the pot in a warm, humid location (70-80°F or 21-27°C). A heating mat can help maintain consistent warmth, speeding up germination.
- Be Patient: Germination can take up to 40 days. Keep the soil consistently moist but avoid overwatering, which can cause mold or rot.
Care for Your Cardamom Plant
Once your seeds sprout, your cardamom plant will need regular care. Here’s how to keep it thriving:
- Provide Indirect Sunlight: Move the pot to a location with filtered sunlight. North- or east-facing windows are ideal. If outdoors, find a shaded or semi-shaded spot.
- Maintain Humidity & Moisture: Cardamom loves humidity, so keep levels above 50%. Water regularly to keep the soil moist, but avoid sogginess.
- Fertilize Sparingly: Use a diluted liquid fertilizer every 2-3 months during the growing season (spring and summer). Be careful not to over-fertilize.
- Repot as Needed: As the plant grows, transfer it to a larger container to accommodate its roots. Choose a deep pot for healthy root development.
Harvesting Your Cardamom
After 2-3 years of nurturing, your cardamom plant will begin to bloom and eventually produce seed pods. Here are some tips for maintaining and harvesting:
- Pruning for Healthy Growth: Trim dead or damaged leaves to encourage new growth. Pinch off excess shoots to maintain the plant’s energy.
- When to Harvest Cardamom Pods: Once your plant flowers, it will produce green seed pods. Harvest them when they turn slightly yellow but are still firm. If left too long, they may dry out and lose flavor.
- Drying and Storing: After harvesting, dry the pods in a cool, dark place. Store them in an airtight container once thoroughly dried.
Frequently Asked Questions
1. Can I grow cardamom indoors?
- Absolutely! Cardamom can flourish indoors as long as it receives indirect sunlight and maintains high humidity levels.
2. How long does it take for cardamom seeds to germinate?
- Germination can take up to 40 days, so patience is key during this process.
3. What type of soil is best for cardamom?
- A well-draining potting mix is ideal for cardamom plants to prevent waterlogging and promote healthy growth.
4. How often should I water my cardamom plant?
- Water regularly to keep the soil moist but not soggy. Monitor the plant to adjust watering frequency based on humidity and temperature.
5. What should I do if my cardamom plant isn’t growing?
- Ensure it has enough warmth, humidity, and indirect sunlight. Check for root binding if it has been in the same pot for a long time.
Growing your own cardamom plant is a fulfilling journey that not only provides you with a fresh, organic supply of this incredible spice but also adds a touch of nature’s beauty to your home. Follow these simple steps, and soon you’ll be enjoying the fruits of your labor with fresh, homegrown cardamom! 🌱✨